Are you tired of drafty rooms and soaring energy bills? Blown-in insulation might be the answer you’ve been looking for. This innovative insulation method offers a convenient and effective way to improve your home’s comfort and energy efficiency. Blown-in insulation provides a seamless solution that can significantly enhance your living environment, whether you’re insulating your attic, walls, or crawl space.
In this comprehensive guide, we’ll explore everything you need to know about blow-in insulation, from the different types of materials available to the installation process and its benefits. Let’s explore how blow-in insulation can transform your home into a haven of year-round comfort.
What is Blown-In Insulation?
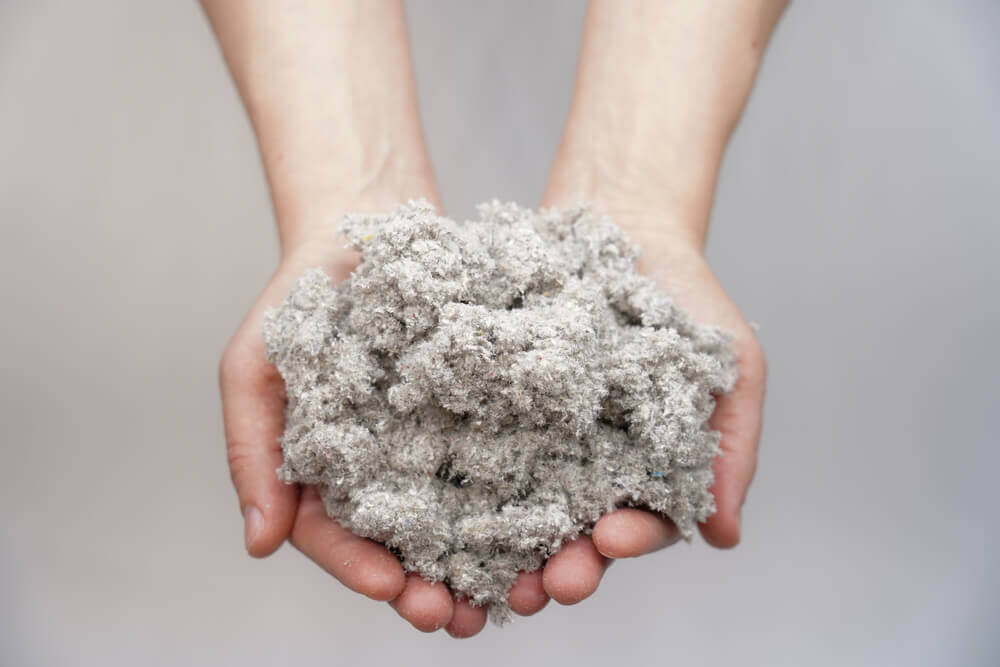
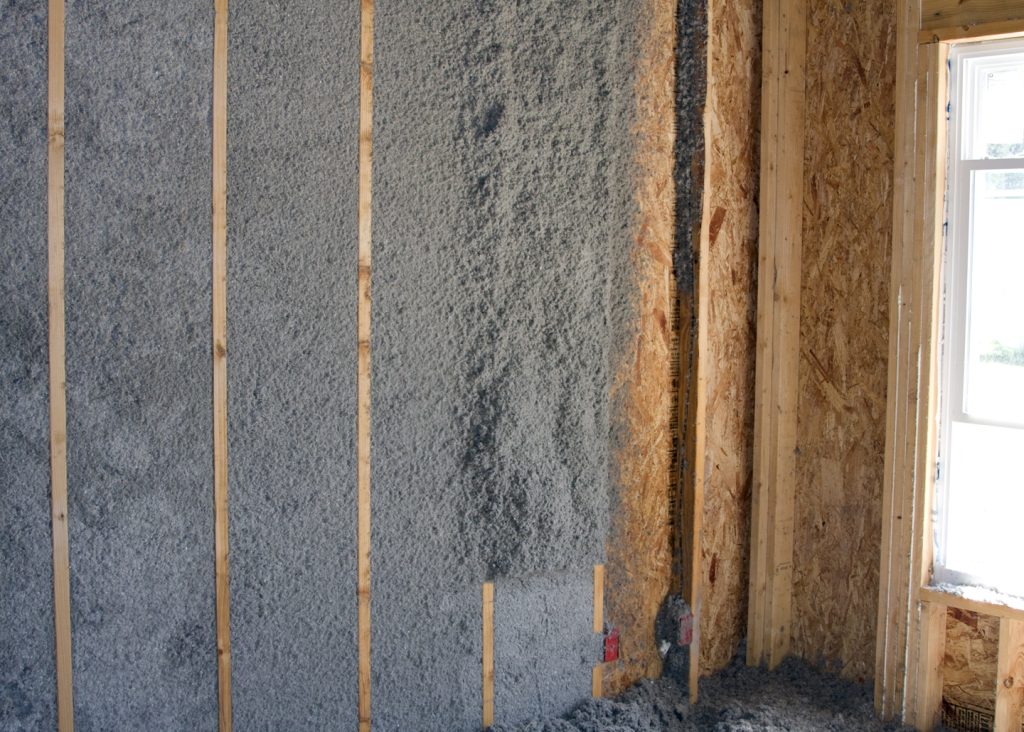
Blown-in insulation, also known as loose-fill insulation, is a method of installing insulation material by literally blowing it into specific areas of your home using a special machine. This fluffy, unbound material is a popular choice for attics, crawl spaces, and even walls, significantly improving your home’s energy efficiency and comfort.
Several different types of blow-in insulation materials are available, each with its own advantages and considerations.
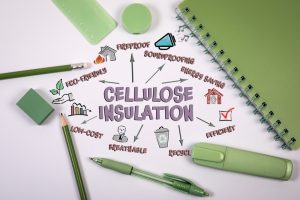
- Cellulose is a common and eco-friendly option, made from recycled paper products treated with fire retardants and insect repellents.
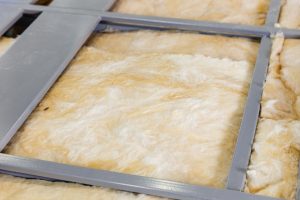
- Fiberglass, another popular choice, is available in a blow-in format and offers excellent insulating properties.
- Rockwool and natural wool are less common but provide superior fire resistance and noise dampening.
How is it Installed?
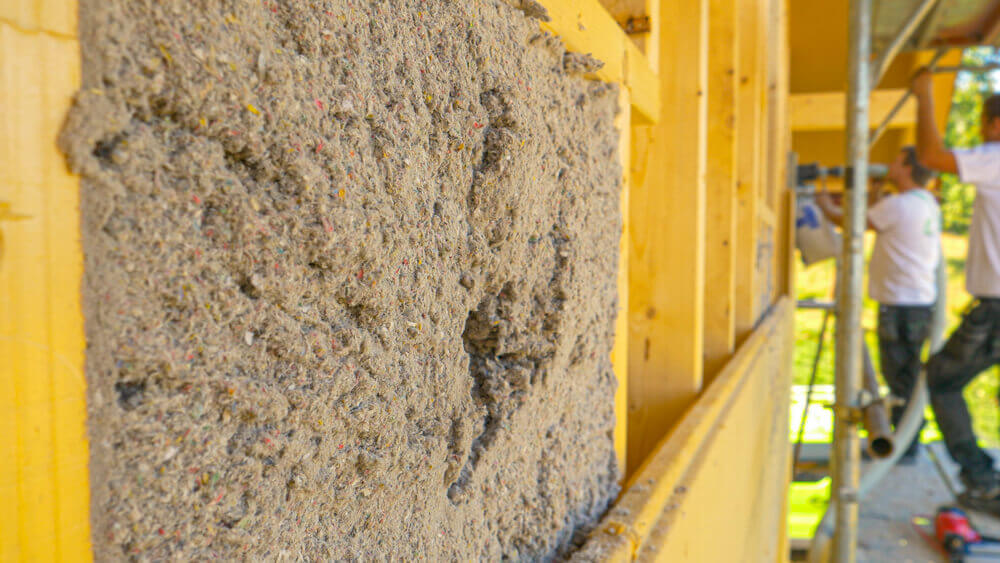
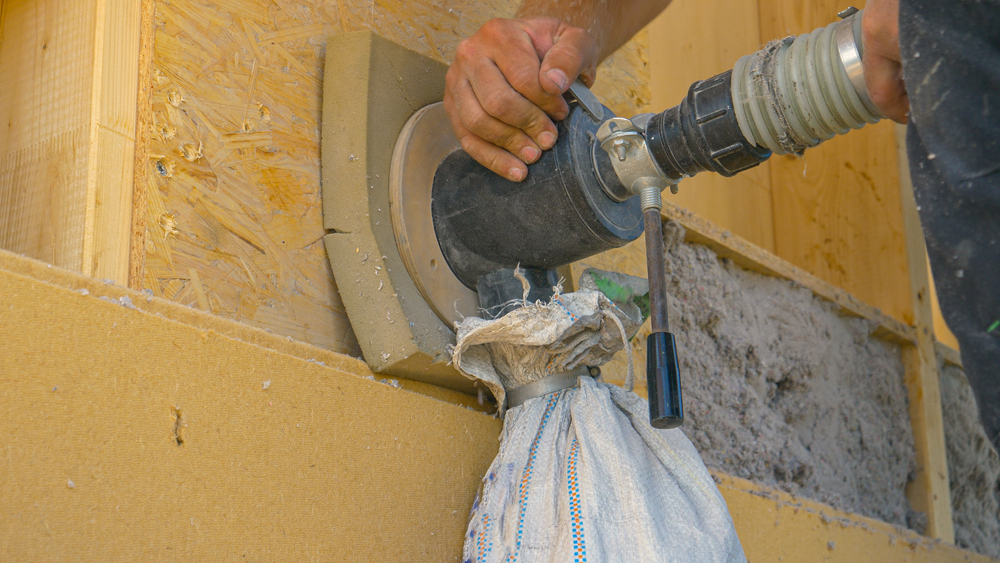
The installation process for blown-in insulation involves a specialized blower machine with a long hose. Professionals will typically drill small holes in specific locations, depending on whether they’re insulating the attic, walls, or crawl space. The hose is then inserted into these holes, and the machine propels the insulation material into the designated cavity, ensuring it fills all nooks and crannies. Once the cavity is filled to the recommended depth, the technician will patch the access holes, leaving minimal cosmetic impact
The Advantages of Blown-In Insulation
Blow-in insulation boasts several advantages over traditional batt or roll insulation:
- It excels at conforming to irregular shapes and tight spaces, effectively plugging gaps and air leaks that batt insulation might miss. This creates a more uniform and complete thermal barrier, leading to improved overall insulation performance.
- The installation process is often faster and less disruptive compared to installing batts, which may require removing existing drywall or other materials.
- Blow-in insulation can settle over time, but unlike batts that can sag and leave gaps, blown-in material maintains its insulating properties better.
However, there are also some considerations to keep in mind when using blow-in insulation. Because the installation involves drilling holes, there’s a potential for minor cosmetic touch-up work afterward, especially when insulating walls.
Blown-in cellulose insulation, while a good choice environmentally, may be susceptible to moisture absorption if not correctly installed, so proper ventilation in the insulated space is crucial.
Finally, DIY installation for wall cavities can be challenging due to potential obstructions within the walls, and professional installation is generally recommended for walls.
Blown-in insulation offers a compelling solution for homeowners seeking to improve their homes’ comfort and energy efficiency. Its ability to conform to difficult spaces and provide a seamless fill can significantly reduce heat transfer and drafts.
By understanding the different types of materials available and the installation process, you can determine if blown-in insulation is the right choice for your specific needs and achieve a more comfortable and energy-efficient living environment.
The Invisible Shield: How Blown-in Insulation Protects Your Home
Imagine your home as a fortress against the elements. During scorching summers, the sun relentlessly bombards your walls, while icy winters threaten to turn your interior into a refrigerator. Blown-in insulation acts as an invisible shield, creating a barrier that keeps your desired temperature locked in and combats unwanted heat transfer. But how exactly does this fluffy material achieve such a feat?
The Power of Still Air: Trapping Heat (or Coolness)
The core principle behind all insulation, including blown-in, lies in its ability to minimize heat transfer. Heat naturally flows from hot to cold areas. In the summer, your attic becomes a furnace, radiating heat downwards into your living space. Conversely, during winter, precious indoor warmth escapes through poorly insulated walls and ceilings.
Blown-in insulation disrupts this flow by creating a layer of air pockets. These air pockets are excellent heat insulators because the air itself is a poor conductor. By trapping still air within the insulation material, blow-in creates a barrier that significantly hinders heat transfer, keeping your home cooler in the summer and warmer in the winter.
Filling the Gaps: Conquering Imperfections
Unlike traditional batts or rolls of insulation, blow-in insulation arrives in a loose, fluffy form. This allows it to excel where its pre-cut counterparts struggle – irregular shapes and tight spaces. Attics with nooks and crannies, oddly angled walls, and crawl spaces filled with pipes and wires pose no challenge for blown-in.
Traditional batts often leave air pockets due to their rigidity, compromising overall insulation effectiveness. Blown-in, on the other hand, creates a uniform and complete thermal barrier, minimizing heat transfer through these weak points.
The Art of Installation: Precision Blowing
The installation process for blown-in insulation is another key differentiator. Professionals use a specialized blower machine with a long hose. Depending on the area being insulated (attic, walls, or crawl space), they strategically drill small access holes. The hose is then inserted, and the machine propels the insulation material into the designated cavity.
This targeted approach allows for a more precise and efficient application compared to traditional methods. Installing batts often involves removing existing drywall or other materials, leading to a more involved and time-consuming process.
Additionally, due to the loose nature of the material, blown-in insulation can be settled and adjusted during installation to ensure optimal coverage.
Settling the Score on Longevity: A Consistent Shield
Over time, all insulation materials can experience some settling. However, blown-in insulation often fares better in this regard than batts. Batts can sag and leave gaps over time, especially in attics where gravity plays a role. Blow-in insulation, on the other hand, tends to maintain its insulating properties better due to its ability to settle and pack together more uniformly.
This ensures a consistent thermal barrier throughout the lifespan of the insulation, maximizing your energy savings and maintaining a comfortable living environment.
Choosing the Right Weapon: A Material for Every Need
Blown-in insulation comes in various forms, each with its own advantages and considerations. Cellulose, a popular choice, is made from recycled paper products treated with fire retardants and insect repellents. It’s eco-friendly but can be susceptible to moisture absorption if not correctly installed with adequate ventilation.
Fiberglass, another common option, offers excellent insulation properties but might raise concerns for those with respiratory sensitivities. Rockwool and natural wool are less prevalent but boast superior fire resistance and noise dampening.
By understanding the science behind blown-in insulation and its unique properties, you can make an informed decision about whether it’s the right choice for your home. It offers a targeted approach to conquering thermal inefficiencies, ensuring a more comfortable and energy-efficient living space throughout the year.
Sealing the Gaps: A Step-by-Step Guide to Blown-in Insulation Installation
Are you feeling the chill of winter seeping through your walls or the relentless heat of summer attacking your attic? Blown-in insulation might be the answer you’ve been searching for. This innovative approach offers a convenient and effective way to improve your home’s comfort and energy efficiency.
But how exactly does this fluffy material get transformed into an invisible shield for your home? How long does it take to blow in cellulose and other types of insulation? Let’s delve into the step-by-step process of blown-in insulation installation.
Preparation is Key: Setting the Stage for Success
Meticulous preparation ensures a smooth and efficient installation. Here’s what you can expect:
- Safety First: Professional installers will prioritize safety by wearing protective gear like masks and goggles to shield themselves from dust and debris. Additionally, they’ll cover furniture and belongings in the affected area to minimize dust infiltration.
- Clearing the Way: Access is crucial. Professionals will identify the most suitable locations for creating access holes in your attic, walls, or crawl space (depending on the area being insulated). These holes will be strategically placed to allow for complete coverage of the cavity.
- Sealing the Deal: To prevent insulation from escaping into unintended areas like living spaces or soffit vents, professionals will meticulously seal off any gaps, cracks, or penetrations around pipes, wires, and light fixtures. This meticulous sealing ensures the insulation stays focused on its intended purpose.
- Checking the Vents: Proper ventilation is vital for preventing moisture buildup and maintaining the effectiveness of the insulation. Professionals will ensure existing ventilation isn’t blocked during the installation process.
Level Up Your Home’s Energy Efficiency With an Insulation Upgrade
Now comes the exciting part – transforming the loose insulation material into a powerful thermal barrier:
- Bringing the Right Machinery: A specialized blower machine is brought on-site. This machine is equipped with a long hose that will act as the delivery system for the insulation.
- Drilling the Access Holes: As planned during the preparation stage, small access holes are drilled into the designated locations. The number and size of these holes will depend on the size and complexity of the area being insulated.
- Utilizing the Equipment: The loose-fill insulation material is loaded into the hopper of the blower machine. The specific type of material used (cellulose, fiberglass, etc.) will depend on your chosen insulation and its suitability for the application.
- Blowing with Precision: With the hose directed into the access hole, the technician carefully operates the blower, propelling the insulation material into the cavity. A skilled installer will ensure even distribution, filling all nooks and crannies to create a uniform and complete thermal barrier.
- Reaching Every Corner: Depending on the complexity of the space, the installer might utilize techniques like crawling or using extension tubes on the hose to ensure even coverage of hard-to-reach areas.
Finishing Touches: Sealing the Deal
Once the cavity is filled to the recommended depth, it’s time to wrap things up:
- Patching Up: The access holes created for blowing are meticulously patched and sealed to minimize any cosmetic impact on your finished surfaces.
- Cleaning Up: The work area is thoroughly cleaned to remove any leftover insulation debris, ensuring a clean and professional finish.
- Safety Inspection: A final inspection is conducted to verify complete coverage, proper ventilation, and no safety hazards.
Considerations and Additional Tips:
- Professional Expertise: While DIY tutorials for blown-in insulation exist, professional installation is highly recommended, especially for walls. Professionals possess the expertise and specialized equipment to ensure a safe, efficient, and complete installation.
- Understanding the Material: The type of blown-in insulation chosen will impact the installation process. For example, cellulose insulation might require additional moisture control measures compared to fiberglass.
- The Importance of Ventilation: Proper ventilation in the insulated space is crucial to prevent moisture buildup and maintain the effectiveness of the insulation. Professionals will ensure existing ventilation isn’t compromised during installation.
By understanding the step-by-step process of blown-in insulation installation, you can gain valuable insight into this innovative approach to home insulation. This knowledge empowers you to make informed decisions and create a more comfortable and energy-efficient living environment.
A Breath of Fresh Air: Exploring the World of Blown-In Insulation
Feeling the heat creep in during the summer or a persistent chill during winter? Drafty attics and poorly insulated walls can wreak havoc on your comfort and energy bills. Blown-in insulation emerges as a compelling solution, offering a convenient and effective way to combat these issues.
But with various materials available, navigating the world of blown-in insulation can feel overwhelming. This comprehensive guide delves into the most common types of blown-in insulation, exploring their unique properties, ideal applications, and factors to consider when making your choice.
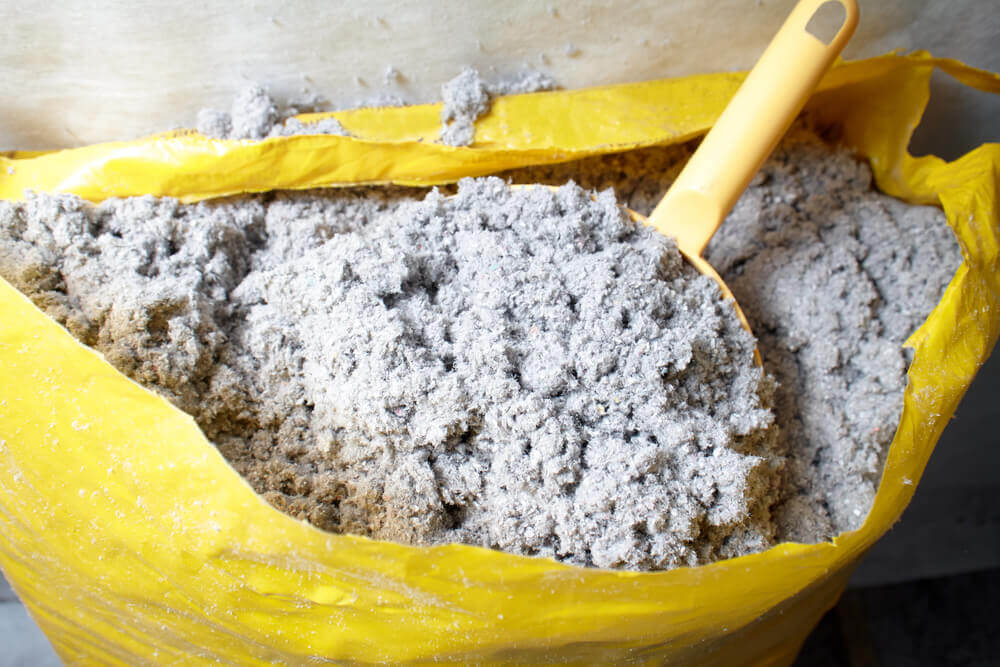
Cellulose: The Eco-Friendly Champion
Made from recycled paper products treated with fire retardants and insect repellents, cellulose is a popular and environmentally friendly choice for blown-in insulation. This fluffy material boasts excellent insulating properties due to its ability to trap air within its fibers. Additionally, cellulose offers some soundproofing benefits, making it a well-rounded option for various applications.
Pros of Cellulose Insulation:
- Environmentally Friendly: Made from recycled materials, cellulose offers a sustainable choice for homeowners concerned about their ecological footprint.
- Excellent Insulation Value: Cellulose provides a high R-value per inch, signifying its effectiveness in resisting heat transfer.
- Sound Dampening: While not a dedicated soundproofing material, cellulose can help dampen noise to some extent.
- Less Irritating: Compared to fiberglass, cellulose can be less irritating for those with respiratory sensitivities.
Cons of Cellulose Insulation:
- Moisture Susceptibility: Cellulose readily absorbs moisture, which can lead to mold growth if proper ventilation in the insulated space isn’t maintained.
- Settling: Cellulose can settle more than other blown-in materials over time, potentially requiring top-ups in the future.
- Weight: Cellulose is a heavier material than fiberglass, which might be a consideration for specific applications.
Fiberglass: The Traditional Powerhouse
Fiberglass is a classic insulation material that is readily available at competitive prices. It is also a popular choice for blown-in applications. It consists of tiny glass fibers bound together with resin, offering excellent thermal resistance and a familiar solution for many homeowners.
Pros of Fiberglass Insulation:
- Affordable: Fiberglass is generally the most cost-effective option among common blown-in insulation materials.
- Widely Available: Fiberglass is available at most hardware stores and building material suppliers.
- Excellent Thermal Resistance: Fiberglass boasts a high R-value per inch, effectively reducing heat transfer and improving energy efficiency.
Cons of Fiberglass Insulation:
- Skin and Respiratory Irritation: The tiny glass fibers in fiberglass can irritate the skin and respiratory system, requiring proper safety precautions during installation and handling.
- Limited Soundproofing: Fiberglass doesn’t offer significant soundproofing benefits compared to other blown-in materials.
Rockwool and Natural Wool: The Fire-Resistant Contenders
For applications where superior fire resistance and soundproofing are crucial, rockwool and natural wool emerge as compelling choices for blown-in insulation.
- Rockwool: Made from spun volcanic rock, rockwool boasts excellent fire resistance and soundproofing capabilities. This non-combustible material offers a significant safety advantage in homes.
- Natural Wool: Derived from sheep or sheep and alpaca blends, natural wool offers fire resistance and soundproofing properties similar to rockwool. Additionally, natural wool is naturally breathable, promoting good air quality within the insulated space.
Pros of Rockwool and Natural Wool Insulation:
- Superior Fire Resistance: Both rockwool and natural wool have excellent fire resistance properties, making them ideal choices for applications where safety is a top priority.
- Exceptional Soundproofing: These materials excel at dampening sound, making them suitable for walls between living spaces or home theaters.
- Naturally Breathable: Natural wool promotes good air quality within the insulated space due to its inherent breathability.
Cons of Rockwool and Natural Wool Insulation:
- Cost: Rockwool and natural wool are typically more expensive than cellulose and fiberglass.
- Availability: Depending on your location, these materials might not be as readily available as cellulose or fiberglass.
- Natural Wool Allergies: While generally safe, natural wool might raise concerns for individuals with wool allergies.
Choosing the Right Champion: Tailoring Your Selection
With the knowledge of various blown-in insulation materials and their properties at your disposal, you can confidently select the champion that best suits your home’s needs. Here are some key factors to consider when making this important decision:
- Climate:
- Climate:
- Humid Climates: Cellulose’s moisture absorption tendencies can be problematic. Fiberglass, rockwool, or natural wool might be better suited for these conditions due to their moisture resistance.
- Cold Climates: Prioritize high R-value per inch for superior heat retention. Cellulose, fiberglass, and rockwool all perform well in this regard.
- Application:
- Application:
- Attics: Cellulose is a popular choice for attics due to its good balance of cost, performance, and ability to fill irregular shapes.
- Walls: Settling can be a concern, so consider fiberglass or rockwool which settle less than cellulose. Rockwool’s fire resistance might be especially valuable for walls between living spaces.
- Crawl Spaces: Moisture control is crucial. Fiberglass or rockwool might be better options than cellulose due to their moisture resistance. Soundproofing might also be a consideration, in which case rockwool or natural wool could be advantageous.
- Budget:
- Budget:
- Cost-Effectiveness: Fiberglass is generally the most affordable option, followed by cellulose. Rockwool and natural wool tend to be on the higher end.
- Environmental Concerns:
- Environmental Concerns:
- Eco-Friendliness: Cellulose is the clear winner here, being made from recycled paper products.
- Other Considerations:
- Other Considerations:
- Settling: All blown-in materials settle to some extent. Cellulose might require more frequent top-ups compared to fiberglass or rockwool.
- Soundproofing: If soundproofing is a priority, rockwool and natural wool offer superior sound-dampening capabilities compared to cellulose and fiberglass.
- Fire Resistance: Rockwool offers the highest level of fire resistance among these materials.
By carefully evaluating these factors, you can make an informed decision and select the blown-in insulation champion that conquers your home’s specific needs. This will help you achieve a more comfortable, energy-efficient, and quieter living environment.
Sealing the Gaps With Blown-In Insulation
Blown-in insulation, a champion for energy efficiency and comfort, offers a unique advantage – its ability to conform to complex shapes and fill tight spaces. Unlike traditional batt or roll insulation, blow-in material gets “blown” into cavities using specialized machinery, creating a seamless thermal barrier.
But where exactly can this fluffy champion be installed? Let’s explore the prime battlegrounds for blown-in insulation and identify the most suitable material for each location.
The Crown Jewel: Conquering the Attic
The attic, notorious for heat gain in summer and heat loss in winter, is the most common and ideal location for blown-in insulation. Here, the loose-fill nature of blown-in excels:
- Unmatched Coverage: Attics often have nooks and crannies around pipes, wires, and uneven rooflines. Blown-in insulation easily fills these gaps, creating a uniform and complete thermal barrier that traditional batts might miss.
- Depth Advantage: Attics typically have sufficient depth to accommodate a thicker layer of insulation, crucial for achieving optimal R-value (resistance to heat flow). Blown-in allows for achieving this depth effectively.
- Material Options: A variety of blown-in materials can be used in attics depending on your needs and budget. Here are some top contenders:
- Material Options: A variety of blown-in materials can be used in attics depending on your needs and budget. Here are some top contenders:
- Cellulose: A popular and eco-friendly choice made from recycled paper products, cellulose offers good insulation value and can be a cost-effective option for attics. However, proper ventilation is crucial to prevent moisture absorption.
- Fiberglass: Another common option, fiberglass provides excellent thermal resistance and is readily available at competitive prices. However, it can be irritating to the skin and respiratory system, requiring proper safety precautions during installation.
- Rockwool: While less common in attics due to cost, rockwool offers superior fire resistance and soundproofing, making it a good choice for attics above living spaces or home theaters.
The Fortified Walls: Battling Drafts and Noise
Walls, another significant source of heat transfer and potential drafts, can also benefit from blown-in insulation. However, there are some additional considerations:
- Settling: Compared to attics, walls have limited cavity depth. Some settling of blow-in material is inevitable, so materials that settle less, like fiberglass or rockwool, might be better suited for walls.
- Accessibility: Installing blow-in insulation in walls typically requires drilling access holes, which might necessitate minor cosmetic touch-ups afterward.
- Material Selection: Here are some blow-in champions for walls:
- Material Selection: Here are some blow-in champions for walls:
- Fiberglass: A popular choice for walls due to its affordability and good thermal resistance. However, it settles less compared to cellulose.
- Rockwool: Offers superior fire resistance and soundproofing, making it ideal for walls between living spaces or home theaters.
Crawl Spaces: A Damp Battleground
Crawl spaces present unique challenges due to potential moisture concerns. While blown-in insulation can be used here, careful consideration is essential:
- Moisture Control: Proper ventilation in the crawl space is critical to prevent moisture buildup and the potential for mold growth. Encapsulation (sealing the crawl space with a vapor barrier) might be necessary before installing blow-in insulation.
- Material Selection: Moisture-resistant materials are crucial in crawl spaces.
- Material Selection: Moisture-resistant materials are crucial in crawl spaces.
- Fiberglass: A good option due to its moisture resistance.
- Rockwool: While more expensive, rockwool can also be a suitable choice for crawl spaces due to its moisture resistance and fire resistance.
- Cellulose: Generally not recommended for crawl spaces due to its moisture absorption tendencies.
The Forgotten Frontier: Flooring Insulation
Blown-in insulation can also be used for floors above unconditioned spaces like garages or crawl spaces, but it’s a less common application. Here are some things to consider:
- Accessibility: Installing blown-in insulation in floors often requires removing existing ceiling panels, which can be disruptive.
- Material Selection: Fiberglass or rockwool might be suitable options due to their ease of installation and moisture resistance (if the space below is not climate-controlled).
Blown-In Insulation: DIY or Professional Installation?
Blown-in insulation, the champion of efficient home comfort, offers a compelling solution for homeowners seeking to combat drafts, improve energy efficiency, and create a more peaceful living environment. This loose-fill material, blown into cavities using specialized equipment, provides a seamless thermal barrier.
But when it comes to installation, the question arises: should you take on the DIY challenge or enlist the expertise of professionals? Let’s delve into the battlefield of blow-in installation, exploring the pros and cons of both approaches and ultimately helping you choose the right champion for your home.
Beginning Your Blown-In DIY Project
For budget-conscious and DIY-enthusiastic homeowners, the appeal of tackling blown-in insulation installation themselves is undeniable. Here are some potential advantages of the DIY approach:
- Cost Savings: The most significant draw of DIY installation is the potential cost savings. Depending on the project size and complexity, you’ll avoid the labor fees associated with hiring professionals, saving hundreds or even thousands of dollars.
- Scheduling Flexibility: DIY allows you to complete the installation on your own schedule, avoiding the need to wait for a professional’s availability.
- Sense of Accomplishment: Successfully tackling a challenging project like blow-in insulation installation can bring a sense of satisfaction and accomplishment.
However, before charging into battle with a rental blower machine, it’s crucial to consider the potential drawbacks of DIY blown-in installation:
- Safety Concerns: Blow-in insulation materials, particularly fiberglass, can irritate the skin, eyes, and respiratory system. Proper safety gear like masks, goggles, and gloves is essential. Additionally, improper installation can create air pockets or gaps in the insulation, compromising its effectiveness.
- Technical Expertise: Blow-in installation requires knowledge of proper ventilation techniques, choosing the right type of insulation for the application, and ensuring complete and even coverage within the cavity. Mistakes can lead to moisture problems, settling issues, and ultimately, reduced insulation effectiveness.
- Equipment Rental: Renting a specialized blower machine adds another cost factor to the equation. The complexity of operating the equipment safely and efficiently can also pose a challenge for inexperienced homeowners.
- Time Commitment: Installing blown-in insulation can be a time-consuming process, especially for larger projects. The preparation, installation, and cleanup stages all require dedication and effort.
- Limited Application: DIY installation might not be suitable for all areas. Complexities like existing insulation removal, tight access to wall cavities, or extensive crawl space coverage might be best left to professionals with specialized equipment and experience.
The Professional Contractor: Experience and Expertise
Hiring a professional blown-in insulation contractor offers several key advantages, especially for larger projects or those requiring specific expertise:
- Safety and Efficiency: Professionals are trained in safe handling of insulation materials and use proper equipment to minimize dust and ensure proper ventilation. They also have the expertise to ensure complete and even coverage within the cavity.
- Time Efficiency: Experienced installers can complete the job quickly and efficiently, minimizing disruption to your daily routine.
- Material Selection and Guidance: Professionals can advise you on choosing the right type of blow-in insulation for your specific needs and application.
- Code Compliance: They ensure the installation adheres to all relevant building codes and safety regulations.
- Warranty and Insurance: Professional contractors typically offer warranties on their work, providing peace of mind in case of any issues after installation. Additionally, they carry insurance to cover any potential damage during the installation process.
However, professional installation comes with its own considerations:
- Cost: The biggest disadvantage of hiring professionals is the added expense. Labor costs can significantly increase the overall project price compared to DIY.
- Scheduling: Professional contractors might have waiting lists, so you might need to schedule your installation in advance, depending on their availability.
Choosing the Right Solution
The decision between DIY and professional blow-in insulation installation depends on several factors:
- Project Complexity: For smaller, easily accessible attics with straightforward installation, DIY might be an option for experienced homeowners with proper safety precautions. Professional expertise is highly recommended for complex projects like intricate wall cavities or extensive crawl space coverage.
- Budget: If budget is the primary concern, DIY might be tempting. However, consider the cost of equipment rental, the potential for wasted materials due to installation errors, and the value of your time when evaluating the actual cost of going the DIY route.
- Your Skills and Comfort Level: Be honest about your DIY experience and comfort level when working with potentially irritating materials and using specialized equipment.
Blown-In Insulation: Maintaining Your Comfort
Just like every insulation type, blown-in insulation requires a little TLC to ensure it continues to perform optimally over time. Here’s a comprehensive guide to maintaining your blown-in insulation and keeping your home a haven of year-round comfort.
Understanding Settling: A Natural Phenomenon
All blown-in insulation materials experience some settling over time. This is a natural process as the loose-fill material compacts within the cavity. The extent of settling varies depending on the type of insulation used:
- Cellulose: Settles more than other materials due to its paper-based composition. However, cellulose’s ability to absorb moisture can help it regain some loft over time.
- Fiberglass: Settles less compared to cellulose, making it a good choice for applications like walls where minimal settling is desirable.
- Rockwool and Natural Wool: Settle similarly to fiberglass, offering good stability within cavities.
The Importance of Proper Ventilation
Maintaining proper ventilation in the insulated space is crucial for all blow-in insulation types. Here’s why:
- Moisture Control: Moisture buildup is the primary enemy of blow-in insulation. It can lead to mold growth, reduce the insulation’s effectiveness, and even damage building materials. Proper ventilation helps prevent moisture accumulation by allowing trapped moisture to escape.
- Maintaining Efficiency: Moisture-laden insulation loses its insulating properties. Proper ventilation ensures your blow-in champion continues to perform optimally.
Strategies for Maintaining Ventilation
There are several ways to maintain proper ventilation in your insulated space, depending on the location:
- Attics: Ensure proper soffit ventilation and ridge venting to promote airflow through the attic space. Inspect and clean vents regularly.
- Crawl Spaces: Install crawl space vents to allow for air exchange. Encapsulating a crawl space with a vapor barrier can also help control moisture.
- Walls: While ventilation within walls isn’t typically a concern for blow-in insulation, ensuring proper overall home ventilation helps manage moisture levels throughout the structure.
Signs You Might Need to Top Up
While settling is normal, excessive settling could indicate the need for a top-up of insulation:
- Increased Drafts: Feeling more drafts in previously comfortable areas might signify a reduction in insulation effectiveness due to settling.
- Higher Energy Bills: A noticeable increase in your energy bills could be a sign that your insulation is no longer performing as well as it should.
- Visible Gaps: In attics or crawl spaces, you might notice visible gaps between roof rafters or floor joists, indicating significant settling.
Top-Ups: Reinvigorating Your Insulation
If you suspect excessive settling or reduced insulation effectiveness, consider a top-up of blown-in insulation. Here are some things to keep in mind:
- Professional Expertise: For top-up jobs, especially in walls or crawl spaces, it’s often recommended to consult a professional installer. They can assess the situation and recommend the best course of action.
- Matching Material: If possible, use the same type of blown-in insulation used in the original installation for a seamless top-up.
- DIY for Attics: For experienced DIYers, top-up jobs in easily accessible attics might be feasible, but proper safety precautions are essential.
Additional Maintenance Tips
- Annual Inspections: Schedule annual inspections of your attic or crawl space to check for signs of moisture problems, mold growth, or excessive settling.
- Addressing Leaks: Promptly address any roof leaks or plumbing issues that could introduce moisture into the insulated space.
By understanding the natural settling process, maintaining proper ventilation, and implementing timely maintenance strategies, you can ensure your blow-in insulation champion continues to perform at its peak for years to come. This will keep your home comfortable, improve energy efficiency, and ultimately help you save money on your energy bills. Remember, a little TLC goes a long way in keeping your blow-in champion strong and your home a haven of year-round comfort.
Valley Insulation: The Blown-In Insulation Experts
Don’t let another season pass without adequate insulation. Valley Insulation is your trusted partner in creating a more comfortable, energy-efficient home or building.
Our expert team is here to help with every aspect of blown-in insulation. From inspections to installation, we can help ensure your home is properly insulated.
Friendly professionals are ready to answer your questions and help you make the best choice for your home. Take the first step towards lower energy bills and a cozier living space. Contact Valley Insulation or give us a call at 513-353-4100 today for a free consultation and estimate.